It’s used to pipeline
Material: brass H62
Material specification:∅25×64
Surface treatment: chrome plated
Properties of Brass H62:
H62 brass represents ordinary brass with an average copper content of 62%, ordinary brass is based on the addition of other elements of copper alloy be called special brass and it is still represented by “H”, followed by the chemical symbol and average composition f other added elements. Such as H62 where the copper content is 60.5%~63.5%, and the remaining content is zinc. HA59-3-2 indicates that its copper content is 57%~60%, aluminum content is about 2.5%~3.5%, nickel content is 2%~3%, and the remaining content is zinc. There are three kinds of brass that are divided into ordinary brass, special brass, and cast brass. Cast brass begins with ZCu followed by the symbol of other elements and their average content.
Ordinary brass has good mechanical properties, it has good plasticity in the cold state, and better plasticity in the hot state. Has good machinability, easy brazing, welding, and corrosion resistance, but it is easy to produce cracks. In addition, the price is cheap and widely used in a common brass variety.H62 brass is much harder at room temperature in β phase than in a phase, so it can be used for parts that bear large loads.“a+” two-phase brass can be hot machining above 600℃.Microstructure of a+β two-phase brass: a is a bright white solid solution and β is a CuZn-based ordered solid solution.
It can make all kinds of tensile and bending manufacturing stress parts, such as pins, rivets, washers, nuts, ducts, barometer springs, screen mesh, radiator parts, etc.
Mechanical property
Strength of extension(Rm N/mm2):385.0
Extend rate(A%):15.0
Chemical component Cu:60.5-63.5 Ni:0.5 Fe:0.15 Pb:0.08 Zn:Remaining
Impurity:0.5
Mechanical property:(σb/MPa)410-630
Elongation(δ10/%)≥10
Vickers hardness:(HV)105-175
Thickness≥0.3)Note: thickness 0.3-10
Processing Technic
The quantities of tools: 9 tools
Tool Type: 35°round turning tool,2MM cut-off tool,∅7.1 drill bit,∅8 boring tools,∅8 inside threading tools,∅5.5 drill bit,1/4-32 screw tap,∅8 milling cutter,∅1.5 drill bit,∅1.5 milling cutter
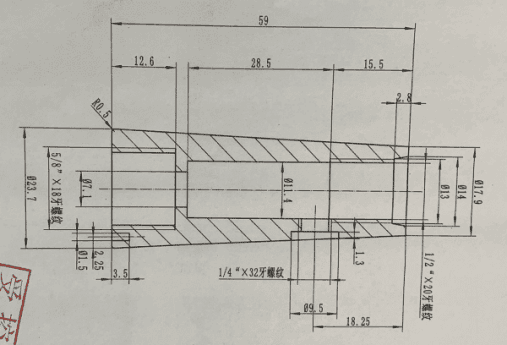
According to the drawing analysis the copper valve parts haven’t special precision requirements in the shape and position tolerance. Therefore, we choose the direction of the 5/8 thread of the parts as the priority for machining, because there is a requirement of R0.5 Angle in this direction. In order to fillet R0.5 Angle and the cylindrical inclined plane and end face processed surface connection relationship is more perfect.
Use a 35°round turning tool machining parts shape, then use ∅a 7.1 drill bit, ∅and 8 boring tools to machine ∅7.1 and 5/8 x18 thread bottom hole.
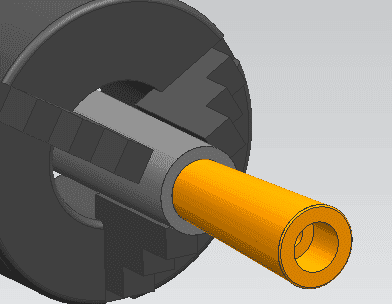
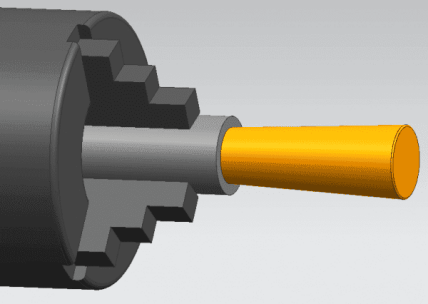
Use ∅8 inside threading tools to machine 5/x18 thread, then use ∅1.5 drill bit,∅1.5 milling cutter to machine hole of ∅1.5×3.5 size, then use ∅5.5 drill bit,1/4-32 tap screw and ∅8 milling cutter to machining ∅9.5 and 1/4-32 thread, then cut off the parts use 2mm cut off tool.
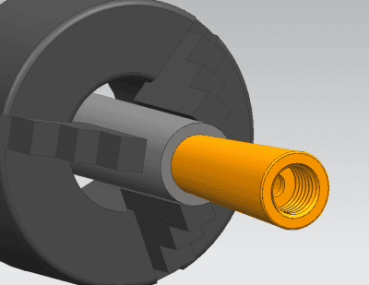
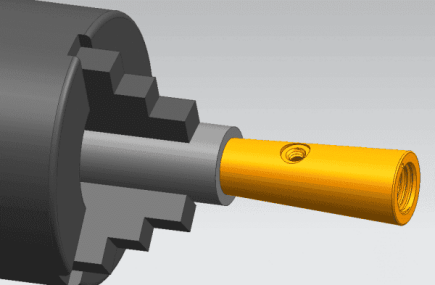
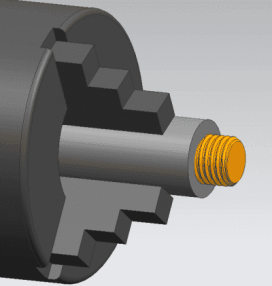
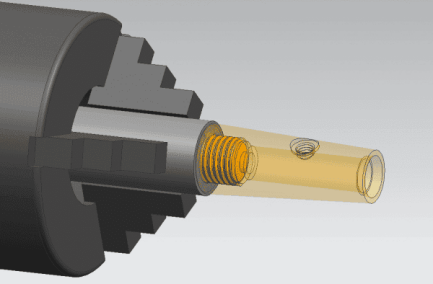
It is necessary to custom clamp before processing at both ends, the male thread 5/8×18 length is 11mm. As the following picture shows:
The reason is that the surface is the inclined plane of these parts and there is no clamping condition. So it only can be assembled with a 5/8×18 internal thread which has been machined with the 5/8×18 external thread of the fixture. Then processing of the remaining part, not only ensure the repeated positioning error of the parts but also improved the processing efficiency.
Use a 35°round turning tool to machine a total length of 59mm, then use ∅7.1 drill bit and ∅8 boring tools to machine 1/2×20 thread. Finally, make surface treatment of chrome plated.
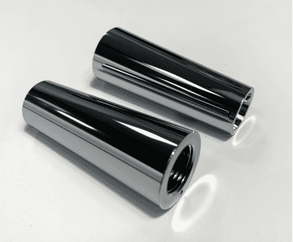
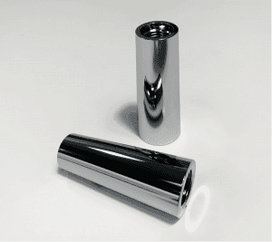
Please refer to the finished parts below:

 info@yijinsolution.com
 (+86) 188-2253-7569


