Calliper has a variety of measuring modes, easy to operate, durable, versatile, and low cost, and can be said to be the most common measuring tool in the toolbox.
However, there are a lot of matters needing attention to the correct use of calipers. Let’s start with the error factors that affect the measurement results.
1. Error Component
When measuring with calipers, many factors cause errors, such as parallax, errors caused by structure, not by the Abbe principle, thermal expansion caused by the temperature difference between calipers and workpieces, and so on.
In addition, because the caliper has no constant pressure device, it is difficult to grasp the appropriate and uniform force measurement when measuring, which is another factor causing errors.
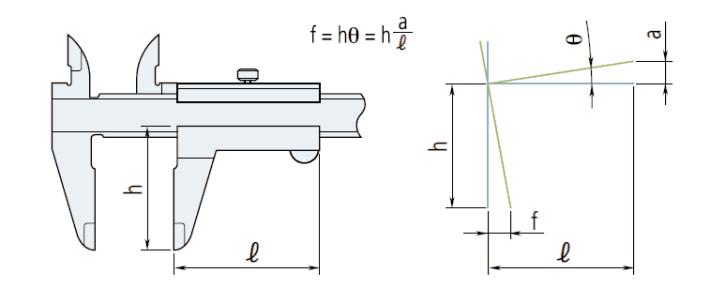
2. The Structure of Calipers Does Not Conform to Abbe’s Principle
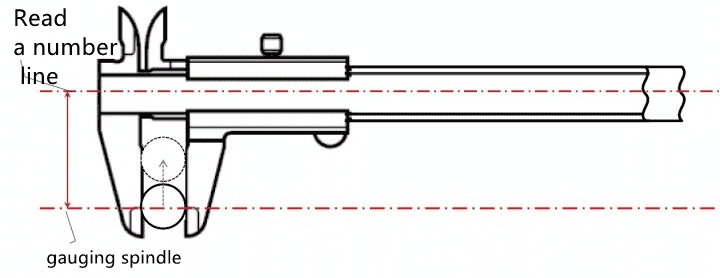
The reading number axis and measuring axis of calipers do not conform to the Abbe principle because of different axes.
So when using calipers, the root or tip of the claw is used to measure, and there will be a risk of increasing the measurement error.
When measuring, it should be noted that the measured workpiece should be as close to the ruler body as possible (reading number axis).
3. Read the Parallax of the Scale
Look directly at the cursor scale when checking that it is aligned with the main scale divider.
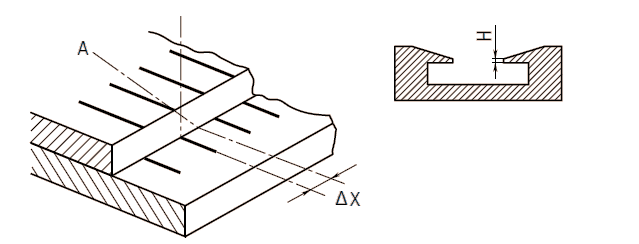
The difference in height between the vernier caliper and the main ruler scale surface is easy to cause a reading error.
As shown in the figure below, if the cursor scale is viewed from an oblique direction, the error shown in Figure ΔX will result.
To avoid this effect, the JIS specification states that the step height (H) should not be greater than 0.3mm.
4. Bending of Datum End Face
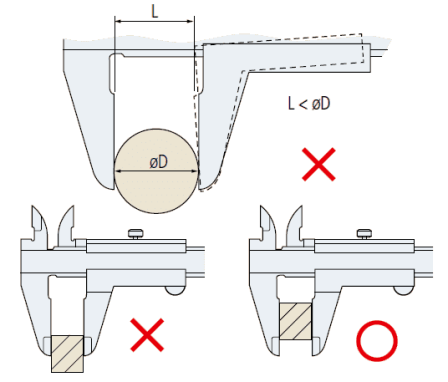
The bending of the ruler that guides the ruler to slide will result in an error as shown in the figure below, which can be expressed by the same calculation formula as the error that does not conform to Abbe’s principle.
Assume that the deformation caused by the bending of the guide ruler is 0.01mm/50mm, and the tip of the outside diameter is 40mm to calculate: f=40mm×0.01÷50=0.008mm
5. The Relationship Between Measurement and Temperature
The body of the caliper is generally made of stainless steel, which has the same thermal expansion coefficient (10.2±1)×10-6/K as iron metal.
The influence of the material of the measured object, room temperature, and the temperature of the workpiece on the measurement should be considered when measuring.
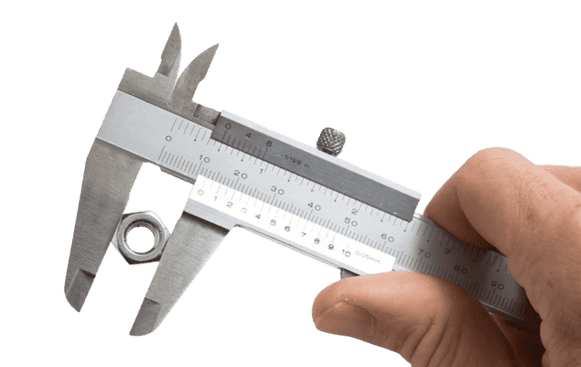
vernier caliper
6. Precautions in Operation
The calipers are very sharp, so the instrument must be handled with care to avoid personal injury.
Avoid damaging the scale of the digital caliper. Do not encode the identification number or leave other information with the electric pen.
7. Maintenance of Sliding Surfaces and Measuring Surfaces
Before using calipers, wipe away dust and dirt on sliding and measuring surfaces with a soft, dry cloth.
8. Check and Calibrate the Origin Before Use
Clip a clean piece of paper between your outer PAWS and slowly pull it out.
Close the caliper and make sure the vernier scale (or display) is set to zero before using the caliper.
When using digital calipers, reset the battery after replacing it (zero buttons).
9. Operation After Use
After using the caliper, wipe off the water and oil thoroughly. Then, lightly smear with anti-rust oil and let dry before storing.
Waterproof calipers, to prevent the occurrence of rust after use, also need to wipe the water calipers.
10. Storage Precautions
Avoid direct sunlight, high temperature, and low temperature, and store in high humidity.
If digital calipers are not used for more than three months, remove the battery before storage.
Do not allow the outside measuring claw of the caliper to be completely closed during storage.

 info@yijinsolution.com
 (+86) 188-2253-7569


